How to create your own TRC20 token on Tron
TRON is a decentralized blockchain content delivery platform to allow creators to publish and own their uploaded content. TRON originally existed as an ERC20 token (TRX) operating on Ethereum's blockchain but now exists as its own blockchain. TRON has its own set of token standards called TRC10 and TRC20. In this guide I will walk you through creating your own TRC20 token.
Contents
Download TronLink
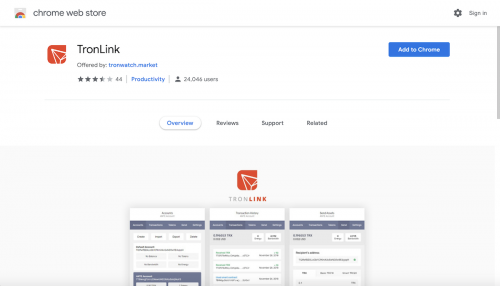
- TronLink is a browser based extension for interacting with the TRON blockchain. It is available for chrome based browsers like Google Chrome and Brave. Add the extension to your browser by clicking the 'Add to Chrome' button.
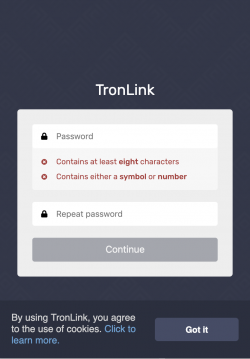
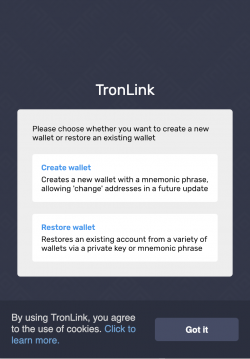
- Once the extension is added, click on it in the upper right hand corner. You will then be walked through some steps to create your wallet. First you are going to create a password then press 'Continue'. Then click on 'Create Wallet' like so:
- Now name your wallet and press 'Continue'. Next copy the mnemonic phrase to a safe place and press 'Continue'. The last step is to confirm the mnemonic phrase by selecting the words in order and press 'Confirm' to finish. You have now created a wallet!
Get test TRX coins
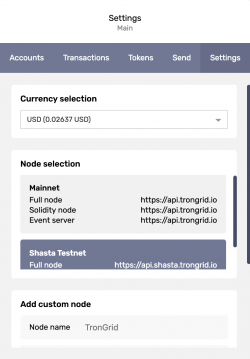
- Click the 'Settings' tab in TronLink and select 'Shasta Testnet' in the 'Node selection' box.
- Next go here and paste in your Tron address and click 'Submit'. 5,000 test TRX will then be deposited to your address.
Install TronBox
We will use TronBox to deploy our smart contract onto Tron's blockchain.
- Paste the following lines of code into your terminal to install tronbox.
npm install -g tronbox
- Make a directory on your computer for tronbox and then enter it
mkdir tron-dev
cd tron-dev
- Initialize TronBox (this can take some time)
tronbox init
Configuring TronBox
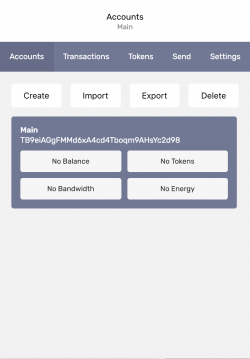
We will need to copy your private key from our Tron wallet and place it in a .env file. Go to your TronLink extension and click 'Export' and copy your private key.
Next create a '.env' file and paste in the following code with your private key.
nano .env
export PRIVATE_KEY_SHASTA=your_private_key
- Press 'control x', then 'y', and then 'enter' to save.
Now we will have to change the version compiler in tronbox.js.
nano tronbox.js
Scroll down to where is says // version: '0.5.4' and uncomment the line (remove the '//') and enter '0.5.10'. Tronbox only supports the following Solidity versions: 0.4.24, 0.4.25, 0.5.4, 0.5.8, 0.5.10.
- When you are done press 'control x', then 'y', and then 'enter' to save.
Modify our token's code
Smart contracts on Tron are built using Solidity, just like on Ethereum.
- Copy the following code into your favorite code editor. I will be using Atom.
- Here's the link to the code shown below TRC20 Code
pragma solidity ^0.5.10;
// Safe maths contract SafeMath {
   function safeAdd(uint a, uint b) public pure returns (uint c) {
       c = a + b;
       require(c >= a);
   }
   function safeSub(uint a, uint b) public pure returns (uint c) {
       require(b <= a);
       c = a - b;
   }
   function safeMul(uint a, uint b) public pure returns (uint c) {
       c = a * b;
       require(a == 0 || c / a == b);
   }
   function safeDiv(uint a, uint b) public pure returns (uint c) {
       require(b > 0);
       c = a / b;
   }
}
/**
 ERC Token Standard #20 Interface
 https://github.com/ethereum/EIPs/blob/master/EIPS/eip-20-token-standard.md
- /
contract ERC20Interface {
   function totalSupply() public view returns (uint);
   function balanceOf(address tokenOwner) public view returns (uint balance);
   function allowance(address tokenOwner, address spender) public view returns (uint remaining);
   function transfer(address to, uint tokens) public returns (bool success);
   function approve(address spender, uint tokens) public returns (bool success);
   function transferFrom(address from, address to, uint tokens) public returns (bool success);
   event Transfer(address indexed from, address indexed to, uint tokens);
   event Approval(address indexed tokenOwner, address indexed spender, uint tokens);
}
// Contract function to receive approval and execute function in one call contract ApproveAndCallFallBack {
function receiveApproval(address from, uint256 tokens, address token, bytes memory data) public;
}
// Owned contract contract Owned {
   address public owner;
   address public newOwner;
event OwnershipTransferred(address indexed _from, address indexed _to);
   constructor() public {
       owner = msg.sender;
   }
   modifier onlyOwner {
       require(msg.sender == owner);
       _;
   }
   function transferOwnership(address _newOwner) public onlyOwner {
       newOwner = _newOwner;
   }
   function acceptOwnership() public {
       require(msg.sender == newOwner);
       emit OwnershipTransferred(owner, newOwner);
       owner = newOwner;
       newOwner = address(0);
   }
}
// ERC20 Token, with the addition of symbol, name and decimals and assisted token transfers contract CoinWiki is ERC20Interface, Owned, SafeMath {
   string public symbol;
   string public  name;
   uint8 public decimals;
   uint public _totalSupply;
   mapping(address => uint) balances;
   mapping(address => mapping(address => uint)) allowed;
   // Constructor
   constructor() public {
       name = "CoinWiki Token";
       symbol = "CWT";
       decimals = 18;
       _totalSupply = 1000000000 * (10 ** uint256(decimals));
       balances[msg.sender] = _totalSupply;
       emit Transfer(address(0), msg.sender, _totalSupply);
   }
   // Total supply
   function totalSupply() public view returns (uint) {
       return _totalSupply  - balances[address(0)];
   }
   // Get the token balance for account tokenOwner
   function balanceOf(address tokenOwner) public view returns (uint balance) {
       return balances[tokenOwner];
   }
   // Transfer the balance from token owner's account to to account
   function transfer(address to, uint tokens) public returns (bool success) {
       balances[msg.sender] = safeSub(balances[msg.sender], tokens);
       balances[to] = safeAdd(balances[to], tokens);
       emit Transfer(msg.sender, to, tokens);
       return true;
   }
   /**
    Token owner can approve for spender to transferFrom(...) tokens
    from the token owner's account
    https://github.com/ethereum/EIPs/blob/master/EIPS/eip-20-token-standard.md
    recommends that there are no checks for the approval double-spend attack
    as this should be implemented in user interfaces
   */
   function approve(address spender, uint tokens) public returns (bool success) {
       allowed[msg.sender][spender] = tokens;
       emit Approval(msg.sender, spender, tokens);
       return true;
   }
   /**
    Transfer tokens from the from account to the to account
    The calling account must already have sufficient tokens approve(...)-d
    for spending from the from account and
    - From account must have sufficient balance to transfer
    - Spender must have sufficient allowance to transfer
    - 0 value transfers are allowed
   */
   function transferFrom(address from, address to, uint tokens) public returns (bool success) {
       balances[from] = safeSub(balances[from], tokens);
       allowed[from][msg.sender] = safeSub(allowed[from][msg.sender], tokens);
       balances[to] = safeAdd(balances[to], tokens);
       emit Transfer(from, to, tokens);
       return true;
   }
   // Returns the amount of tokens approved by the owner that can be transferred to the spender's account
   function allowance(address tokenOwner, address spender) public view returns (uint remaining) {
       return allowed[tokenOwner][spender];
   }
   // Token owner can approve for spender to transferFrom(...) tokens from the token owner's account.
   function approveAndCall(address spender, uint tokens, bytes memory data) public returns (bool success) {
       allowed[msg.sender][spender] = tokens;
       emit Approval(msg.sender, spender, tokens);
       ApproveAndCallFallBack(spender).receiveApproval(msg.sender, tokens, address(this), data);
       return true;
   }
   // Send back ETH
   function () external payable {
       revert();
   }
   // Owner can transfer out any accidentally sent ERC20 tokens
   function transferAnyERC20Token(address tokenAddress, uint tokens) public onlyOwner returns (bool success) {
       return ERC20Interface(tokenAddress).transfer(owner, tokens);
   }
}
Now let's configure your token:
- Name your token on line 83
- Change your token's symbol on line 84
- Set your token's decimal on line 85 (Most tokens have 18 decimal places but you can have any number you like)
- Change your token's supply on line 86
- Change the contract name on line 72
Now we are going to add our code to TronBox.
- Enter contracts directory
cd tronbox/contracts
- Make new file for our token and paste in the modified code from your text editor. Name the file like so: <name_of_token>.sol
nano CoinWiki.sol
- Press 'control x', then 'y', and then 'enter' to save your file
Modify Migrations
- Modify '2_deploy_contracts.js' to match your token
cd ..
nano migrations/2_deploy_contracts.js
- Uncommit both lines that have commits and replace all instances of 'MyContract' with the name of your contract
- Press 'control x', then 'y', and then 'enter' to exit and save your file
Compile and Deploy your Token
- Input the following code into your terminal to compile and deploy your smart contract to the Tron testnet.
cd ..
tronbox compile --compile-all
source .env && tronbox migrate --reset --network shasta
- After you migrate your smart contract to the Shasta testnet you will see two variables: base58 and hex. The base58 value is your 'contract address'. To see your new token, paste the value into the search bar on Shasta Tronscan.
(base58) TMRAvTVVnCvkPjQMYJrEqeKUtqiwqn65ZN
(hex) 417d92767fbb81cfcc604e452dd6558039181fb33d
